Skip to content

User Guide

Claim Testing Token

  • Assume you have set up your wallet account, if not, please refer to here
  • Head to the Automata Faucet, you may need to login via Twitter account to get access to the faucet page.
  • Choose ContextFree under the Network drop-down field
  • Input your ContextFree wallet address and submit, 10 CTX native token will be sent to your account, can check on our Blockchain Dashboard.

Interface Layout

  • Now let's explore our AnyDAO frontend
  • The left panel are the directory, the right panel shows the contents.
  • Currently you can see all the projects registered on AnyDAO

Connect Wallet

  • The connect button is located at the bottom of the left panel.
  • If you want to disconnect, click on your connected wallet and you can find the disconnect button there
  • Currently you have to connect with a PolkadotJS wallet to proceed to the following operations: Register Project, Update Project, and Create Proposal.

Create Project

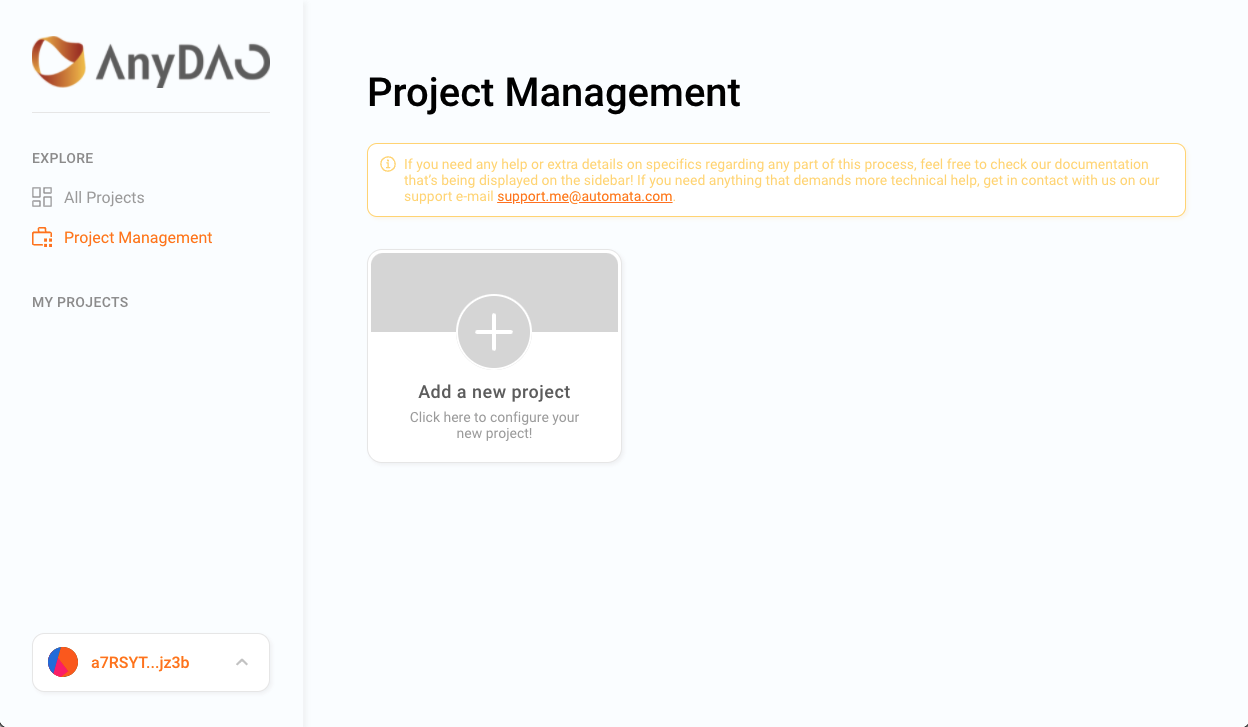
  • Once you have connected with a wallet with a corresponding contextfree account, you will see another entry Project Management appears at your left panel. Make sure you are connected with a Polkadot Extension Wallet.
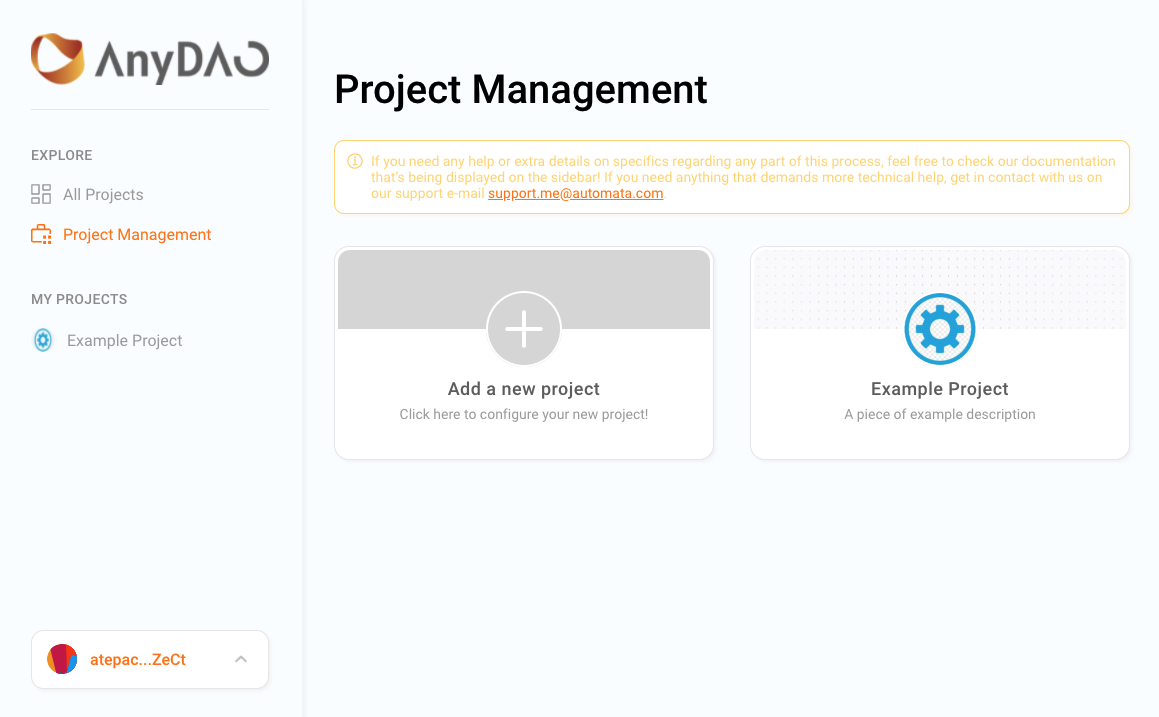
  • Go to Project Management, then Add a new project
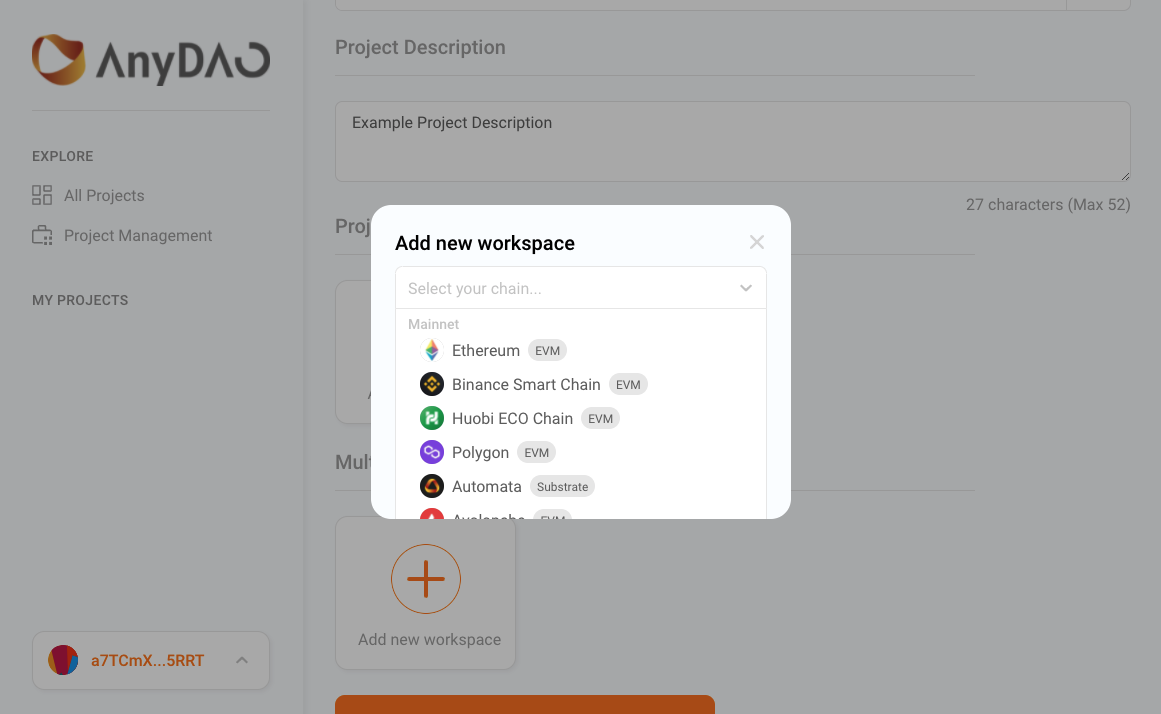
  • Fill in your Project title, description
  • Upload your project icon, banner
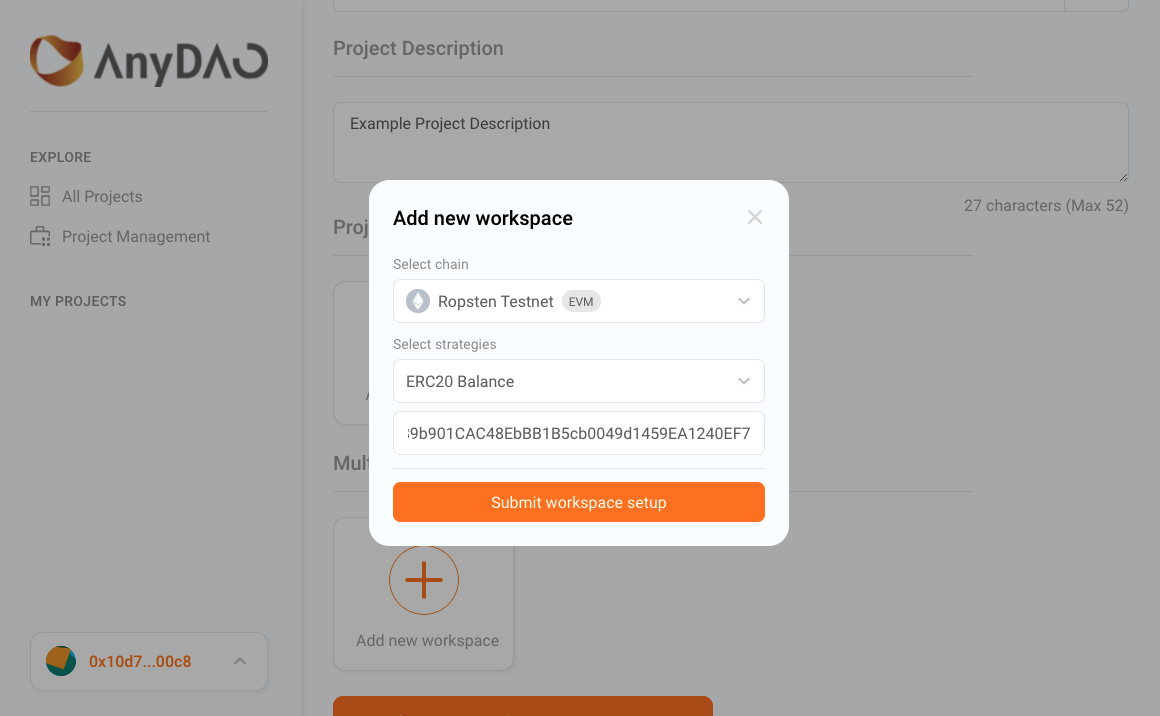
  • Then add workspaces for your project, choose the chain you want to add
  • Attach available strategy to it, such as
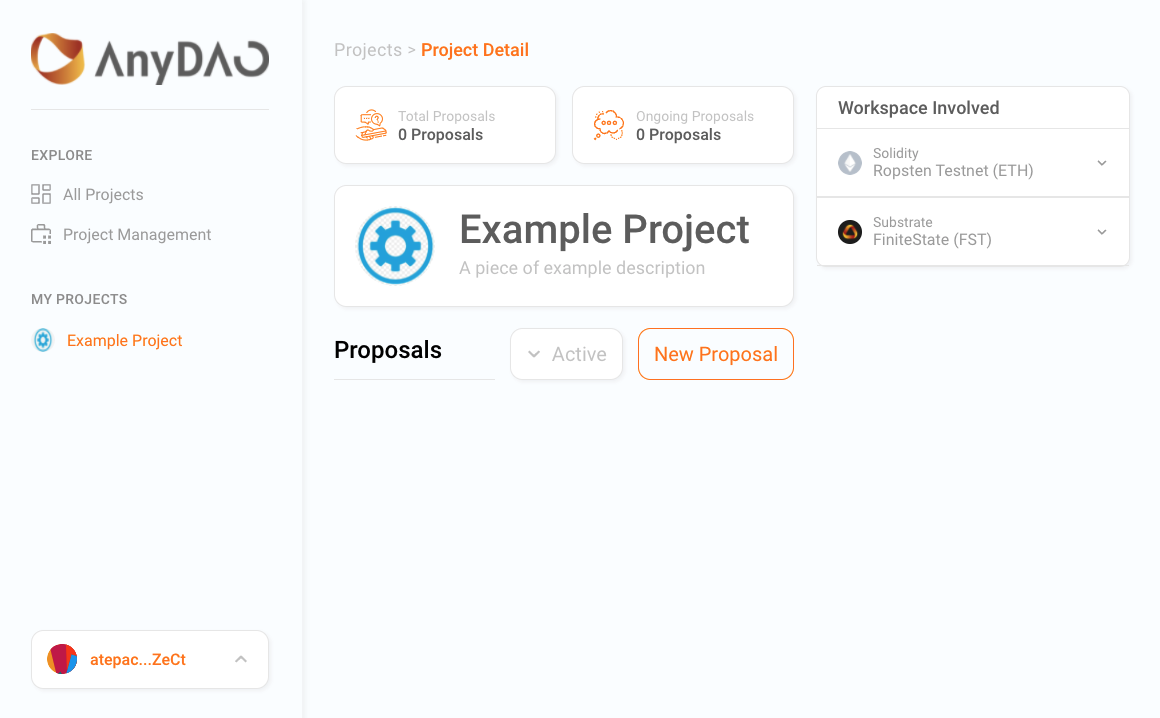
  • You should be able to see like this if everything set up
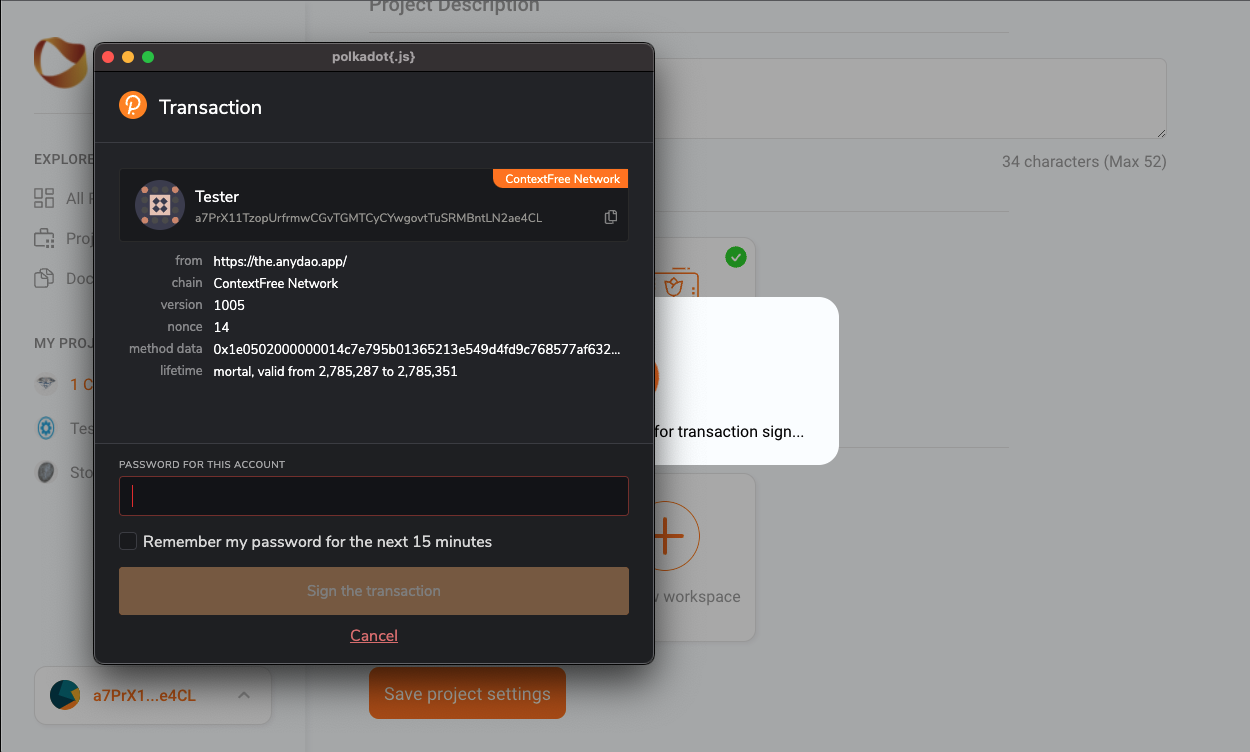
  • Press Submit new project and follow the wallet instructions to submit the transaction. Ensure your wallet has enough tokens to pay for the transaction fee.
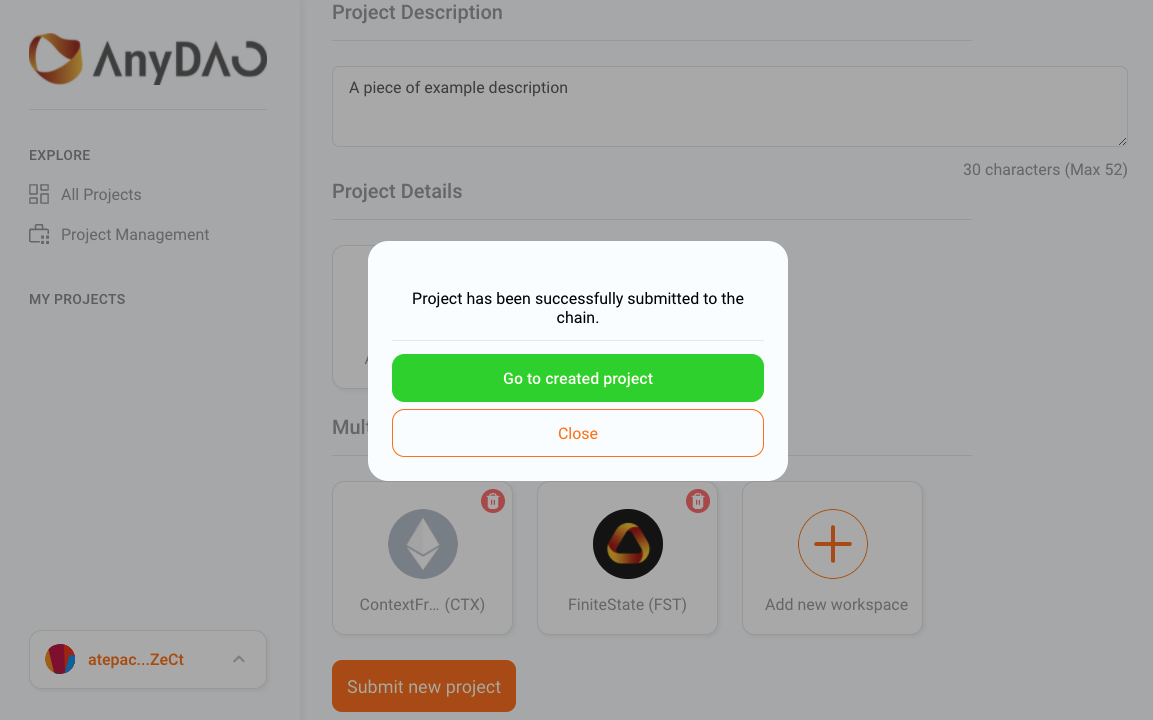
  • If you see this it means you succeeded. You can check your created project

Update Project

  • Upon successfully created your project, you should be able to see your project in Project Management page
  • Go into your created project, you should be able to see your previous configuration for your project.
  • Change any of the fields you wish to, and click Save project settings, follow the wallet instructions and submit the transaction.

Create Proposal

  • Go to any project, you should see the detail page. Click New Proposal
  • Fill in the title, description as you want for the proposal
  • Then click Define proposal configurations to configure your proposal.
  • Here you can see more details of Privacy level
  • Here you can see more details of Voting Type
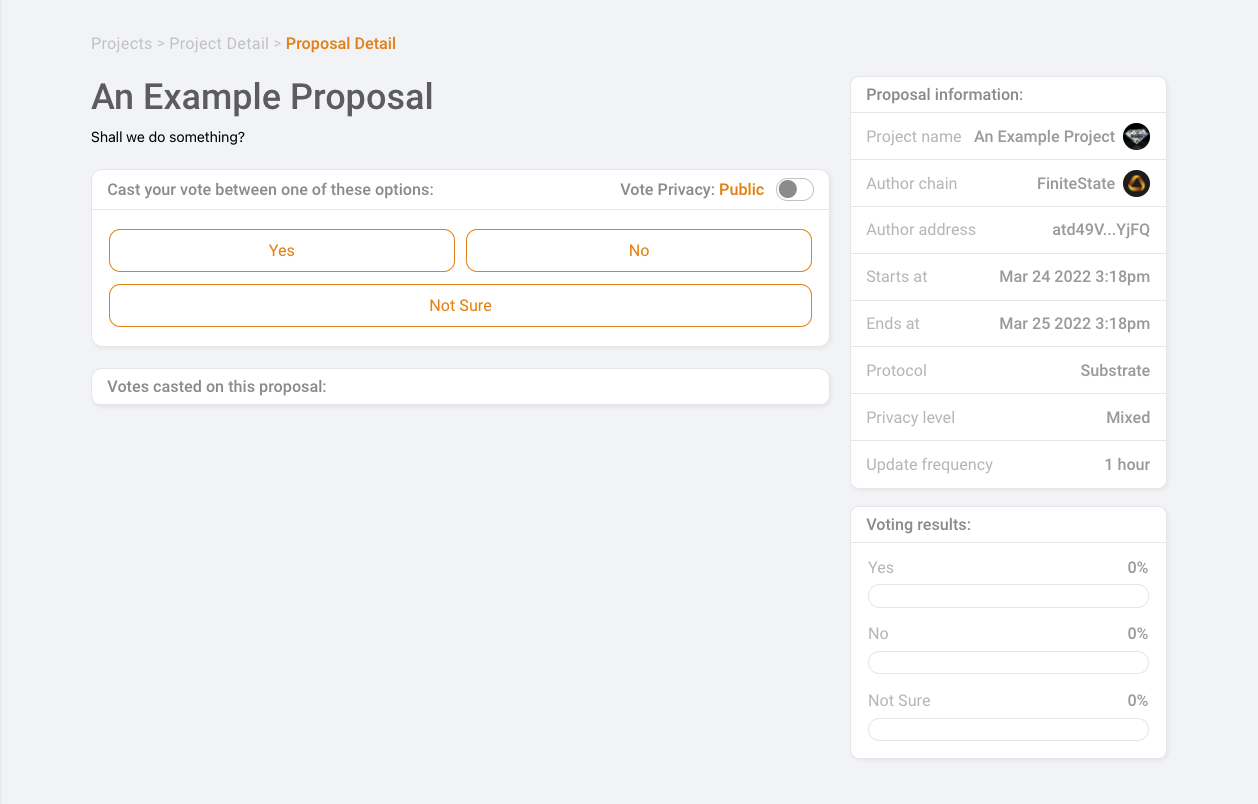
  • Starting date & Ending data: the actual timing you want to start and end your proposal voting period. Here you can see more details of Time Restriction
  • Here you can see more details of Update Frequency
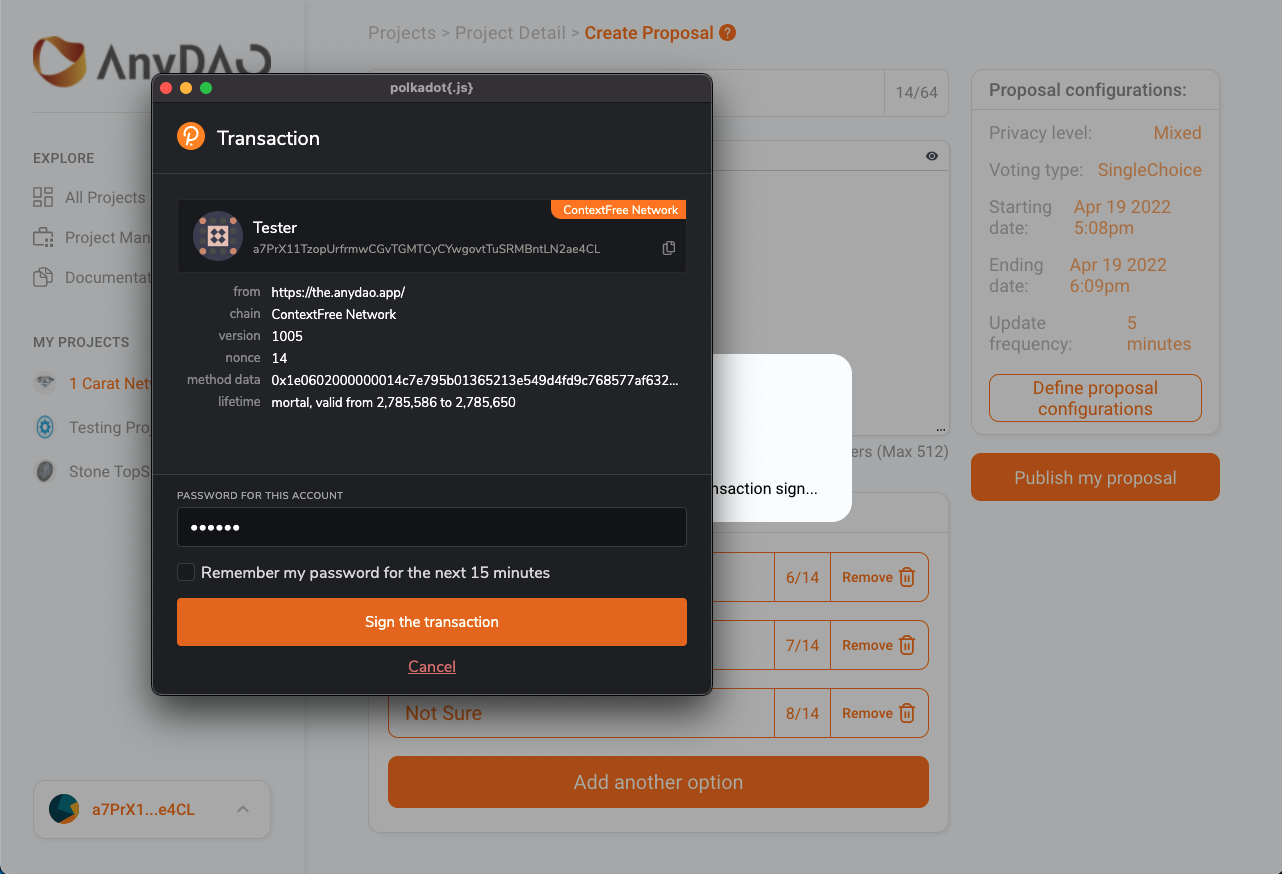
  • Click Publish my proposal and follow the instructions to submit your transaction. You should be able to see your proposal once it's successfully created.

Vote

  • Go to any on-going proposal or the one you just created.
  • Check the detail about the proposal, make sure what are you voting with :D
  • For proposal with privacy level Mixed, you can toggle the Vote Privacy to choose whether vote publicly or anonymously
  • if you choose to vote publicly, details of your vote will be made available, such as:
  • if you choose to vote anonymously, your details won't be revealed to anyone.
  • Click on the option you want to cast your vote.
  • The voting only requires the signature from your wallet, no fee will be charged for voting.
  • You can use either Metamask wallet or Polkadot Extension Wallet according to the project workspace configuration.
  • Here is an example of a closed proposal, it's the time to try your own, cheers! 🙌